Using Photoshop
I actually presume you have some small knowledge of the Photoshop software. If you are totally
new to Photoshop you may like to take a few beginners tutorials on the websites...links to these are on the links page. Otherwise
go slowly and carefully and I think you will be ok.
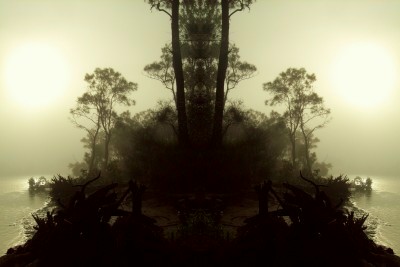
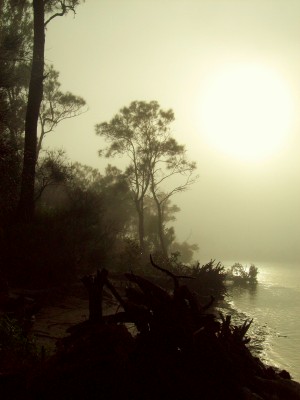
Start with a picture you want to merge, you can have 1 picture
or as many as you want,but for this tute lets just have one
.Once you have it copied in your clipboard (right click > copy or CTRL+C) go file and create a new document.
On the new file you will see on the sides a ruler around your picture Before clicking OK, look at the width. Bring out
the calculator and multiply the width by 2. This will give us room for both sides of the image. Now click OK, then paste the
image inside the document. Then duplicate the layer. Now, finally go to Edit > Transform > Flip Horizontal.
You
should have two layers (both the same image). Move the second image to the right so it's identical to the left side. However,
move it to the left a little bit more so it overlaps the edge. Now when we erase this part, it won't go to a transparent background.
Now you should have some open space on the right side if you did this correct, that's OK.
Grab your eraser tool from the
Toolbox on the left and change it to a brush on the top instead of pencil / block. Now change the size to anywhere around
100. I used 122. Also, make sure the hardness is at 0. Then gently erase the edges of the image on the right. Just make sure
you don't see any grey/white boxes which represent transparency. If you do, then move the right side more to the left.
-
Finishing Touches
That's it! You should have one complete image now. If you don't fool around with the right side or move
it to the left a little. Or choose a bigger brush and only use the ends of it to erase. This tutorial might seem simple to
a few people, but I'm sure it might inspire you to do something larger then something like this or might expand your thinking
cap!
Congratulations! Your picture looks great.